Assignment 2 Video Production
IN614 Video Production
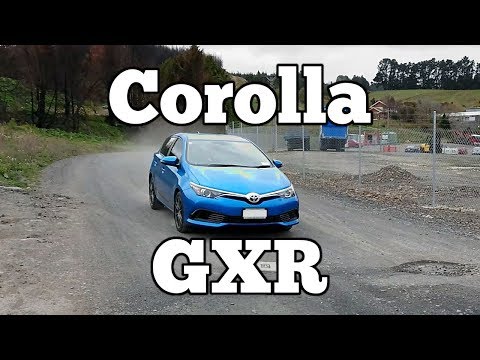
Final Video Edit
Pre-Production
For the pre-production phase, I teamed up with both Nic and Josh to create the Script, Shot list, Storyboards and Schedule. For all of these, excluding the Storyboards, we decided to use Celtx, which is an online basic scriptwriting program which provided us the formatting required to get our documents looking like a professional standard.
We decided to work together as originally we had our own ideas, but issues regarding our ideas got in the way, so we grouped together and decided to work off a single script.
In terms of storyboarding, we left that rather late, doing it after we had finished our post-production. In hind-sight it wasn’t really the smartest plan, as in the production phase, we didn’t exactly have a full idea of what we wanted to achieve in the shots, only basing them off what we had in our shot-list. Our shooting schedule was fairly simple, we decided to film on Tuesday the 11th, Right after we had finished with class for the day.
The shooting schedule was as follows:
P.O.V Shots 1 - Get the footage from the driver as we drive to the filming location. We did this first after grabbing tape for the GoPro.
Exterior Shots - Get all footage relating to the exterior of the vehicle. Done once we arrived in a gravel parking lot.
Interior Shots - Get all footage relating to the interior of the vehicle. Done once we finished all Exterior Shots.
Driving Shots 1 - Get footage of the vehicle driving on the road. We did this while on the way to Josh’s place to review the GoPro Footage from earlier.
Driving Shots 2 - Get more footage of the vehicle driving on the road. We did this after having a lunch break and reviewing the GoPro Footage from earlier.
P.O.V Shots 2 - Get more footage from the driver as we get the Driving Shots. Unfortunately, The GoPro did not record this which was a pity, but we had enough
coverage from the first set of P.O.V Shots that it wasn’t too much of a hinderance.
Below you can find the pre-production documents.
Storyboards


Production
Video Recording
For video production, we scouted different locations for filming, and decided on one location that worked. We went out to the location after class and began filming. Our cameras of choice were our phones, and a GoPro Hero 4 That I was able to borrow for the first-person POV shots we had in mind. This decision was good, as it kept our budget low. I did originally plan to purchase a gimbal for my phone to have more steady shots than what we ended up getting, but the cheapest gimbal was way above what I wanted to spend for this project. The lack of storyboards caused a few issues when getting shots, as we didn’t know exactly what we wanted to film, so we based all our shots off what we had on the shot-list to the best of our ability, and I feel like it turned out okay too.
Luckily, we managed to get all our filming done in the one day, so continuity wasn’t a problem in our video. The weather luckily held up throughout the day as well, so lighting didn’t vary too much for us, which made editing later on much easier.
We used the film techniques taught in class to achieve the shots we wanted, ranging from close-ups to wide shots, allowing variation to be made with our video. We also made sure that we had enough coverage when filming so that we didn’t repeat shots unless we wanted to in post-production.
A problem we encountered as mentioned above was when we were filming the second lot of P.O.V Shots from the GoPro when heading to the location for our final shots. I had accidentally hit the photo button instead of the record button when leaving Josh’s place. This resulted in not getting more P.O.V footage that we could have used in our post-production, however the amount of footage we got from the first P.O.V shooting left us with enough footage, even though it wasn’t exactly what we were after in the end.
Audio Recording
For audio production, I went away and recorded the voice-over, after we had decided that I would be best for the task. I recorded the voice-over using a Blue Yeti Microphone, and recorded it using Audacity. I did slight edits to the recording, removing any background audio, before uploading the file to google drive for the others to use in their videos.
Post-Production
The post-production phase is where we split as a group, as we had different ideas on how we wanted to edit our videos. After making sure all the footage and required audio was uploaded to a Google Drive folder for the team to access, I began renaming the files and sorting them into the Media Bins in Sony Vegas.


My inspiration for my Video was a Youtuber named Regular Car Reviews (Word of Warning: his content would not be considered Safe For Work, my video does not follow this part of his style). The most notable part of his videos is the music at both the beginning and the end of the video, which relates to the video he is reviewing. In order to achive this, I ended up going into a program named Mixcraft, which is an audio editing program created for creating and mixing music. I downloaded a free MIDI file of the song “My Sharona” by The Knack, and writing up some cheesy lyrics that relate to the car, before “singing” my version over the top of the MIDI file, before exporting it as a .mp3 file for use in Sony Vegas.

My Video Editing program of choice, as previously mentioned, was Sony Vegas 14.0. I chose this program as I have had experience using it in the past for editing different videos. I originally thought that it might not be as equiped as other editing programs, such as Davinci Resolve or Adobe Premier Pro, however, after some digging around, I found that it did have the functions of the two previously mentioned programs. After some tinkering with the windows, I was able to bring up the Colour Correction UI, which was very useful for applying correct Colour Correction, just like we had been taught in class.

Regarding the colour correction. I found that I didn’t need to do much to our footage, only making slight adjustments to the contrast and saturation for most clips. We got very lucky with this, since we filmed everything on the same day and the weather held up pretty well, so the colours between video clips didn’t vary too much. There was one clip however which caused slight issues, which was a clip where we had to film the boot of the car. Because we started filming it away from the boot, as we got the camera closer, the camera adjusted to the light levels in the boot, which messed up the colour correction. I ended up having to keyframe the colour correction for this one clip, and after some slight adjustments, I got a result I was happy with.

In terms of Audio, I followed what we had been taught in class about voices and how loud they should be. I ended up adjusting the gain of the Voiceover Track so that my voice wasn’t peaking over -6dB, which is the maximum volume that a voice should be in video production, got my voice sitting around -8dB. I also did the same with the Music Track, lowering the gain until I achieved the same result.
With rendering the project. I rendered the video in 1080p, 30Hz. My reasoning for the lower framerate is due to us using the different cameras, and I didn’t want to have some footage showing at 60Hz, where other clips would have been at 30Hz due to the limitation of the cameras, or because they had been configured incorrectly. I rendered the clip into a .mp4 file type, as this provides decent compression of the video without losing too much quality. I have used this setting for a multitude of different videos.
Overall with my edit I’m happy with the result I’ve achieved, and I feel like I replicated my inspiration pretty closely, which is a success in my book. The project file was a lot smaller than I was expecting, as some of the videos I have edited in the past have become quite cluttered on the Timeline.
